We have all been there. You open your jewelry box, getting ready for a wedding or a dinner, and your heart sinks. There it is—your favorite gold Jhumka or that diamond stud you bought with your first salary. But it’s all alone. The other one is lost, perhaps somewhere in a hotel room or fallen on a dance floor years ago.
Or maybe you have a gold chain that snapped in half, or a ring that got crushed in a drawer.
Most people do one of two things:
- Let it sit in the locker gathering dust for decades.
- Exchange it for cash (and lose 30% of the value in “making charge” deductions).
Stop! Don’t sell it yet.
As a jewelry editor, I am a huge advocate for “Upcycling.” Gold is eternal. Just because the shape is broken, doesn’t mean the value is gone. In fact, some of the most unique, conversation-starting pieces I have seen on the runway started as “broken” jewelry.
Today, I am going to teach you how to be your own designer. Let’s talk about how to turn that single lonely earring into a pendant, and other genius ways to repurpose your broken gold.
Read more: Himachali “Guluband” Designs
Why Repurposing is Better Than Exchanging
Before we get into the “How-To,” let’s talk about the money.
When you take a broken earring to a jeweler to exchange it for a new one:
- They melt it to check purity (Risk 1).
- They deduct 10-15% for “wastage” or melting loss.
- You pay new making charges on the new item.
- Result: You lose money.
When you repurpose (modify) the existing piece:
- You pay a small labor charge (usually ₹500 – ₹2000).
- You keep the original sentiment.
- You get a “new” piece of jewelry without buying gold.
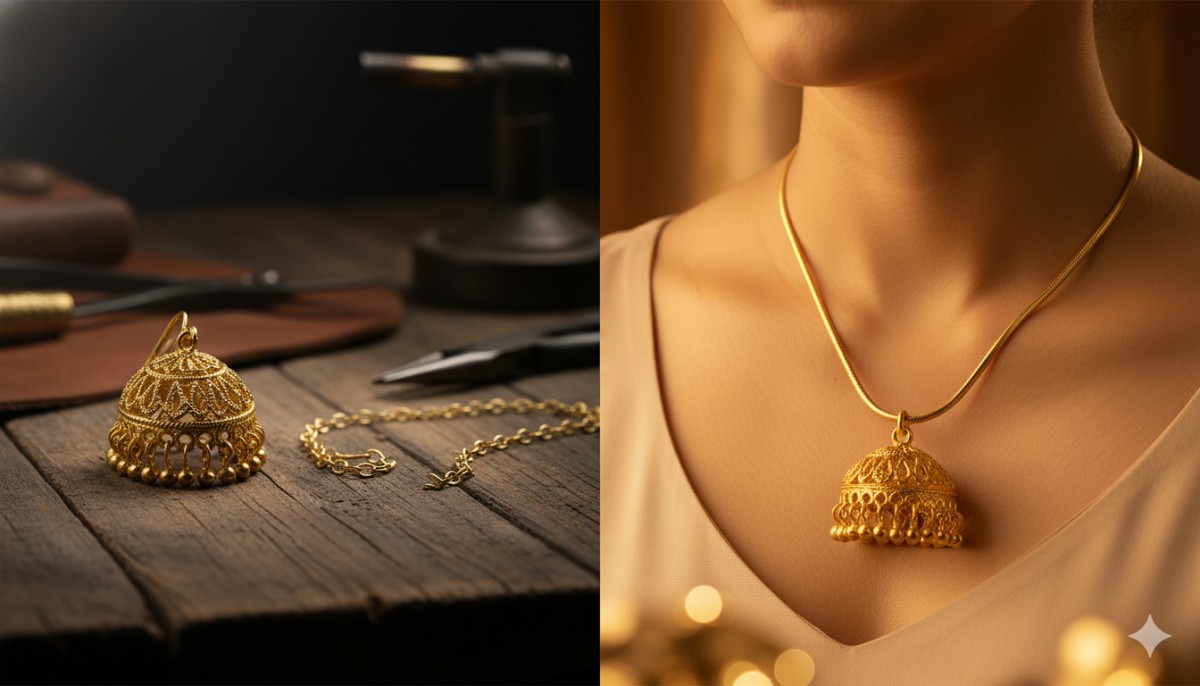
Idea 1: The “Single Earring” to Pendant Conversion
This is the most common dilemma. You have one heavy gold Jhumka or a Chandbali, and its partner is gone. You can’t wear one earring (unless you are very avant-garde), but it makes for a perfect pendant.
The Transformation Process
You cannot just string a chain through it. Here is the technical way to do it:
1. The “Stick” Removal: Take the earring to a local goldsmith (Karigar). Ask him to cut off the “post” (the stick that goes through your ear).
- Note: Don’t throw this stick away! It is pure gold. Ask the jeweler to melt it or fuse it into the design to add weight.
2. Adding the “Bail”: This is the most important word you need to know: Bail. The bail is the loop on top of a pendant that the chain goes through.
- Hidden Bail: The jeweler solders a small loop behind the design. This makes the earring look like it is “floating” on the chain.
- Decorative Bail: If the earring is simple, add a V-shaped or diamond-studded bail on top to give it height and elegance.
3. The Orientation: Earrings are designed to hang straight down. Ensure the jeweler balances the weight so the new pendant doesn’t flip over when you wear it.
Pro Tip: The Maang Tikka Hack: If you have a heavy single Chandbali, don’t just make it a pendant. Add a hook and a light chain to the top, and voila! You have a stunning Maang Tikka for your next family wedding.
Idea 2: The “Charm” Necklace (For Broken Bits)
Do you have “scraps”? A piece of a broken bracelet, a small pendant with a missing stone, and a single stud earring?
Don’t melt them. Combine them. The “Charm Necklace” trend is huge right now. It involves taking a sturdy gold chain (like a cable chain or paperclip chain) and attaching multiple mismatched items to it.
- How to do it: Ask your jeweler to add small “jump rings” to each of your broken bits.
- The Look: Attach them at intervals of 2 inches along the chain.
- The Vibe: It tells a story. “Here is my grandmother’s broken ring, next to my baby’s first earring.” It is bohemian, messy, and incredibly luxurious.
Idea 3: The Ring-to-Pendant Flip
Sometimes a ring breaks at the shank (the band at the bottom), or your fingers size changes and it no longer fits.
Instead of resizing the ring (which weakens the gold), turn the “face” of the ring into a pendant.
- Cut the Shank: The jeweler removes the circular band.
- Polish the Edges: Smooth out where the band was cut.
- Add a Loop: Solder a loop on the top of the ring’s design.
Result: A heavy, solitaire-style pendant that sits flat on your chest.
Idea 4: From Brooch/Pin to Choker Centerpiece
Do you have an old gold safety pin or a saree brooch that you never use because it feels “old fashioned”?
These pieces usually have intricate work.
- The Fix: Remove the pin mechanism from the back.
- The Style: Attach a black velvet ribbon or a gold mesh chain to both sides of the piece.
- The Result: A vintage-style choker where the brooch becomes the glorious centerpiece.
Technical Advice: Finding the Right Karigar
This is where most people fail. They take their broken gold to a big, fancy showroom (like Tanishq or Kalyan).
- The Problem: Big showrooms usually refuse repairs on items they didn’t sell, or they push you to “Exchange.”
- The Solution: Find a local, family-run goldsmith or a “Jewelry Repair Workshop” in your city’s Zaveri Bazaar or jewelry market. These artisans are the masters of modification. They have the torch and the tools to do customized soldering right in front of your eyes.
Safety Check: Purity Mismatch
When soldering new parts (like a bail) to old gold, be careful about purity.
- If your old earring is 22k gold, ensure the jeweler uses 22k solder.
- If they use 18k solder on 22k gold, it will lower the purity of that specific spot, which might affect the value if you ever decide to sell it later.
- Always ask for the leftover gold scraps back if they cut anything off.
Conclusion: Creativity Over Scrap
Your jewelry box is not a graveyard for broken things; it is a treasure chest of raw material.
That single earring isn’t “useless.” It is a pendant waiting to happen. That broken chain isn’t “scrap.” It is a bracelet waiting to be resized.
By repurposing, you honor the memory of the piece. You keep the gold that your parents or grandparents bought for you, but you change its form to fit who you are today. And honestly? Wearing a custom-designed pendant made from a vintage earring is infinitely cooler than wearing something mass-produced.
My challenge to you: Go open your locker today. Find that one “useless” broken piece. Take it to a jeweler this weekend and give it a second life.
Frequently Asked Questions (FAQs)
How much does it cost to turn an earring into a pendant?
It is very affordable. If you are just cutting the post and adding a simple gold loop (bail), it should cost between ₹500 to ₹1,500 depending on the weight of the extra gold used for the loop and the labor charge.
Can I turn a stud earring (tops) into a nose pin?
Yes, but be careful. Earring posts are usually 1mm thick. Nose pins need to be much thinner (0.8mm or less) to be comfortable. The jeweler will need to file down the post or replace it with a thinner wire.
Will soldering damage the gemstone in my earring?
It can. Diamonds and sapphires can withstand heat, but softer stones like Pearls, Emeralds, or Corals can crack or burn under the torch. A skilled jeweler will remove the stone, do the soldering work, and then re-set the stone. Always ask them about stone safety first.
What if I have a broken gold chain? Can it be fixed invisibly?
Yes. A good goldsmith can solder a broken link. However, the soldered spot might be slightly stiff. If the chain is badly damaged, consider shortening it to make a bracelet instead.